
Check Other Email Accounts From Gmail

Do you have a Gmail account?
Do you know you can check other emails using your Gmail account? For example, you can check myemail@mydomain.com using your Gmail account.
If you have multiple email accounts, you can check them in Gmail. Google Gmail allows you to add other email accounts. You can send and receive emails as myemail@mudomain.com, for example. You don’t need to login to individual email accounts to send and receive, All can be done using your Gmail account.
Facing problem in using webmail? Don’t worry you can use the Gmail interface to send and receive emails with the email account you have created with your domain. You just need to setup your domain’s email address as a POP3 and SMTP account in your Gmail account. Gmail can be used as an email client. This article will help you to configure your webmail in Gmail.
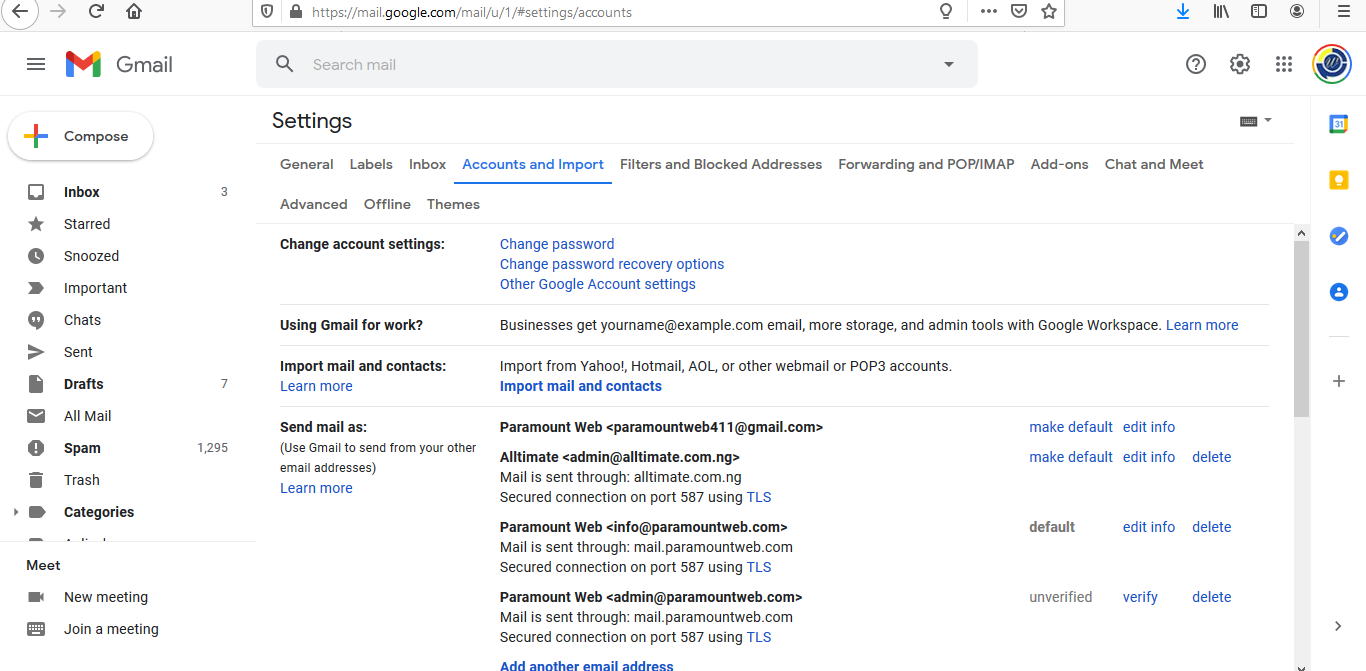
- Login to your Gmail account.
- Go to the top right-hand corner, select the gear icon and click on settings icon.
- Click on the Account and Import tab.
- Go to send mail>>>Add a mail account (This will allow you to send mail as myemail@mydomain.com for example)
- A new pop up window will be displayed, follow the instructions
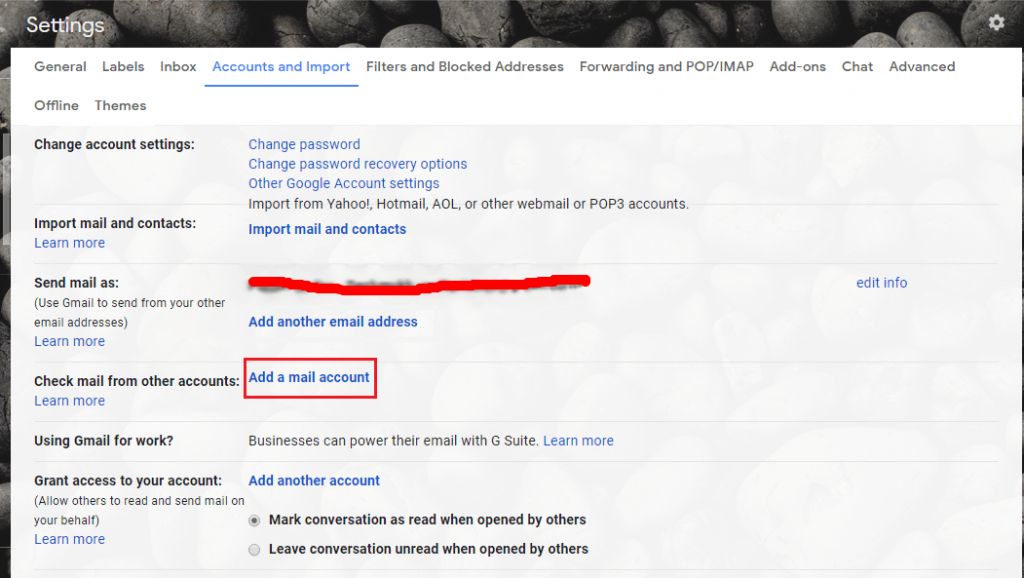
- Go to Check mail from other accounts. (If you have multiple email accounts, you can check them in Gmail).
- A pop up window will open. Follow the prompt
———————————————————————————————————————————–
1. Login to your Gmail account.
2.Go to the top right-hand corner, select the gear icon and click on settings icon.
 3. Click on the Account and Import tab.
4. Click on the Add a mail account.
5. A new window will be displayed. Enter your email address here.
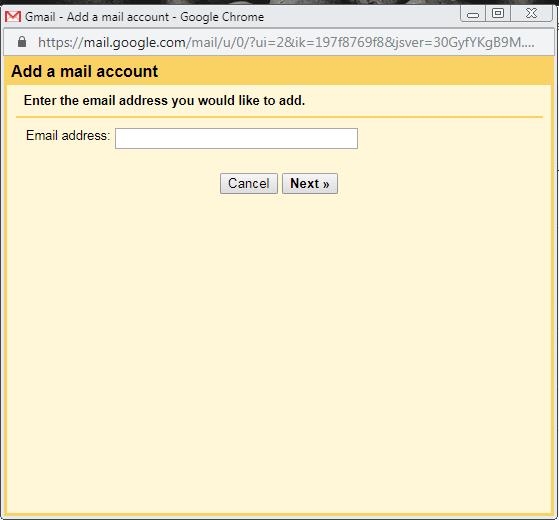
6. Click on Next button.
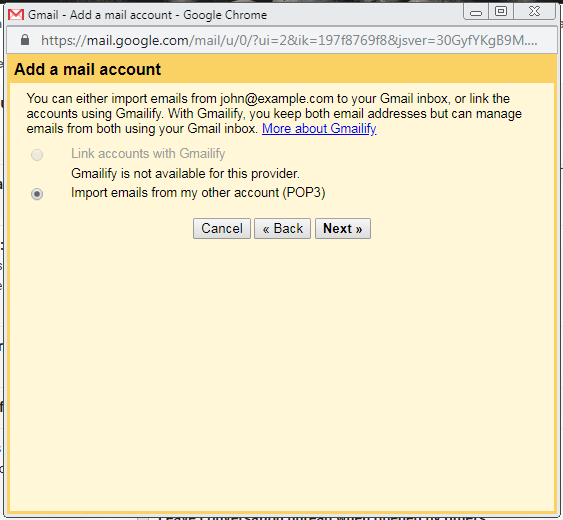
7. Select the option “Import emails from my other account (POP3)”.
8. Enter your complete email address in the Username.
9. Also, enter the Password for your email account.
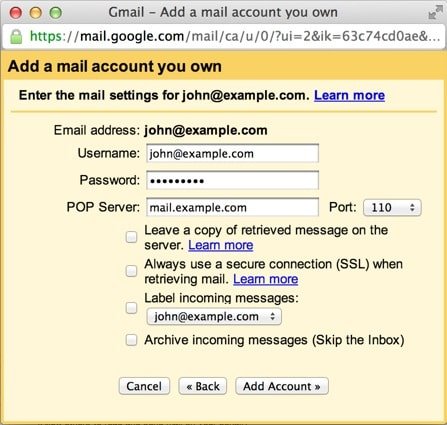
10. Enter the POP Server. This will differentiate depending on if you choose to use the Always use a secure connection (SSL) option.
• Without SSL: This indicates your domain name preceded by “mail.”
• With SSL: This indicates your server’s hostname. Check that the port is changed to 995. You can go to cPanel, if you don’t know your server’s hostname. Go to the Stats section on the right hand side. Click the expand stats link if it is present. You will see the hostname in the list of stats.
11. Select any additional options that you want to.
12. Click the Add Account button.
Outgoing Mail (SMTP)
1. Select the option ” Yes, I want to be able to send mail as john@example.com”.
2. Select if you want to use this address as an Alias.
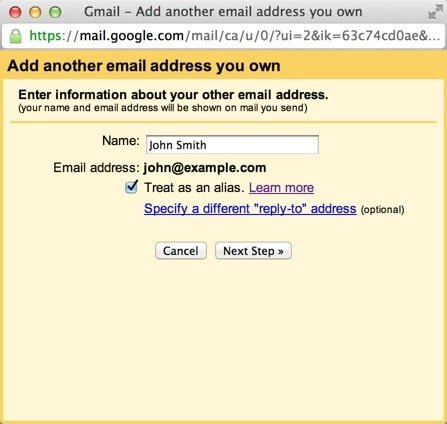
3. Click on the Add account button.
4. Select to send “Send through example.com SMTP server”.
5. Enter the SMTP Server.
• Without SSL: This indicates your domain name preceded by “mail.”
• With SSL: This indicates your server’s hostname. Go to your cPanel, if you don’t know your server’s hostname. Go to the Stats section on the right-hand side. Click the expand stats link if it is present. You will see the hostname in the list of stats.
6. In the Username section enter your complete email address.
7. Enter Password for your email account.
8. Select Port 25 (Non SSL) or 465 (SSL).
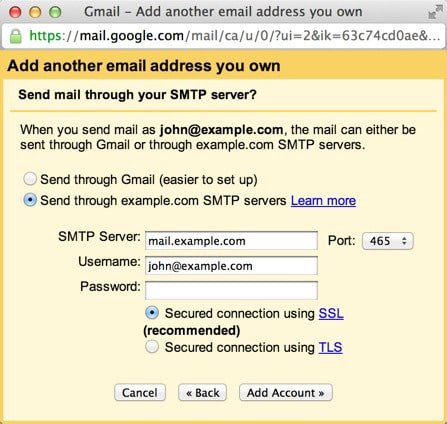
9. Select any additional options that you want to.
10. Click the Add Account button.
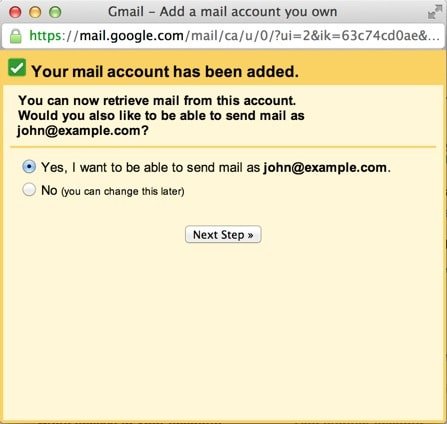
Now, you will receive a verification code from Gmail to your email address you just added. Either click on the link in the email or copy/paste the code into the text box and click Verify.
After this, you will see your domain’s email address in the Send mail as and the Check mail from other accounts sections.
Congratulations! You have now configured your webmail in Gmail.
Recommended Posts


Web Design in Abuja: Elevating Your Digital Presence with Paramount Web
December 17, 2025

How Can AI improve My Website?
September 23, 2025
How May I help you?